|
 |
 Fundamentals
Rollable Drops Single downhill steps.
Rollable drops are small drops in the trail similar to a kerb edge that can be ridden without lifting the front wheel. With good technique and practise you can ride slowly down vertical square edged drops of up to 2ft.
Start small.
Start by practising on a relativley small drop of around 4-6" (10-15cm). A larger step is illustarted to the right to exagerate the movements involved.
A concrete step is ideal as it allows you to concentrate on the step rather than the approach and runout. Lowerinf your saddle a little will allow you to move about the bike much easier making this technique much easier.
Check the run out after the drop for any potential obstacles before commiting to it.
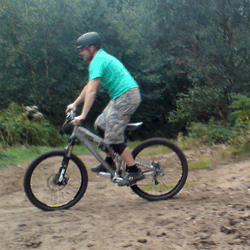
Start by approaching the drop to be rolled down in the attack position at walking pace.
As the front wheel goes over the edge of the drop extend your arms pushing forward and down with your arms to get the wheel on the ground whilst keeping your weight back over the cranks.
At the same time bend your knees to lower your body so the bars dont get too far under your body.
Keep this position until the rear wheel starts down the step when you extend your legs quickly whilst pulling up on the bars to get the rear wheel down whilst keeping your weight centered.
Lower your body back to the normal attack position as you ride off.
Once comfortable at walking pace start doing the drop at higher speeds.
As you get quicker there will be less delay between the two wheels dropping until they almost drop together at high speed.
Bigger drops.
When you are comfortable on a relatively small drop at a range of speeds find one a couple of inches or 5cm higher to practice on. Only progress to a lrager step when you are completely happy riding down the one you are currently practicing on.
Crouch back and down as you push the front wheel over the drop to help keep your weight on the cranks rather than the front wheel.
Too much weight on the front will lead to the suspension compressing quickly followed by the front end tucking under and a trip over the bars.
This will also give you the extra leg extension required for the larger drop.
Flat to a downslope roll-downs.
When a drop has a flat approach to a downward runout push the front off the drop a little more than you would a similar size flat/flat drop.
When the rear drops you won't need to put as much effort into getting it level as the bike will remain pointing down on the runout.
Downhill rolldowns.
Downhill rolldowns are the easiest to do.
Gravity helps you take them at speed which reduces the amount of time the front has to drop before the rear follows it therefor less effort is required to smoothly level the bike.
The downslope landing is also a lot smoother when you land on it.
Downslope to flat roll-downs.
For a downslope to flat step you need to put a lot more effort into levelling the bike as the rear wheel drops. Explosivelly extend your legs and pull up harder on the bars to get the bike level as you land.
On larger downhill steps with a flat run out be prepared to absorb your bodies downward momentum with your arms and legs once the rear wheel hits the flat section of trail.
Moving on.
Once you get to drops of about 18" (40cm) you will find the outer chainring or bashguard may start catching on the edge of the drop as you roll off it.
To avoid catching the crankset on the edge of the drop go off it at slightly higher pace. Once comfortable with a variety of drops and speeds, progress to the drop-off technique in the advanced riding skills section.
|
top | home | beginners | fundamentals | advanced | downhill | resources
Copyright ©2009 MTB Techniques | All rights reserved
The information on this site should be taken as a broad guide only and is open to interpretation and misunderstanding. You should consult a qualified instructor for more information about any of the tips given. MTB Techniques cannot accept responsibility or liability for accuracy, clarity or your interpretation of any of the topics provided. Mountain biking can be dangerous. You must make sure you understand the level of risk involved and wear suitable protective equipment whenever you ride.
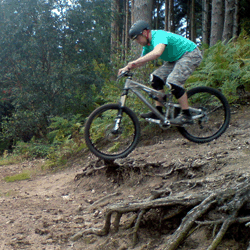
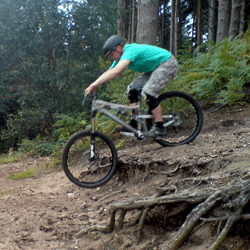
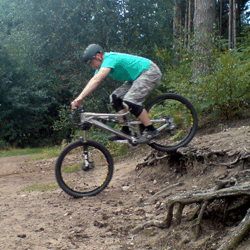
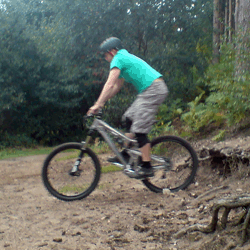 Once you get to drops of about a foot or more the front of the bike will point down quite a bit when you ride off them slowly.